Wednesday, October 5, 2016

Halloween Card

I've got a card up at the ScraPerfect Blog today. It's a Halloween Card because you know it'll be here before we know it!


I started by embossing some Core'dinations Cardstock and then sanded it. What a mess it makes but I used ScraPerfect's Perfect Cleaning Cloth on it and it really got all the little bits cleaned up. 


I cut the BOO out on my Cricut and then decided to try the ScraPerfect Transfer Foil on it. I love how it turned out!


I also popped the Boo up to give the card some dimension.

This was my first time using some of ScraPerfects products and I loved them. They do exactly what they're supposed to do. Wish I'd found them earlier!

Thanks for stopping by!

Cutest Pumpkin Ever

I've got a stash challenge up at Creative Inspiration today. I want you to dig into your stash of embellishments and use at least 5 different kinds of embellishments on your project.


I've used bling, wood veneer, thread, stickers and washi tape. I hope you'll stop by and play along with us and while you're there be sure and check out all the other challenges we have going on!

Thanks for stopping by!

Saturday, October 1, 2016

World Cardmaking Day

I can't believe it's World Cardmaking Day already! Time flies when you're having fun I guess! Anyway, we're having a mini crop over at Creative Inspiration with lots of fun challenges and games and of course prizes. My challenge for the crop is to use punches on your card.


This is an anniversary card for some good friends of ours. Actually they married us and we've been friends ever since. 

Hope you'll stop by Creative Inspiration and play along with the challenges in our mini crop.

Thanks for stopping by!

Trinket Box

The Robin's Nest is having a Design Team call and I'm excited to be trying out for a second term with them. I have had so much fun playing with all their wonderful products and don't want it to end. For my project I decided to make a trinket box.


I started with a small round container that held some Brie cheese....just the perfect size.


I used a navy blue cardstock to cover the sides of the container and cut a circle from the Robin's Nest  Charity Never Faileth paper for the top.


I took some white lace and wrapped it around the sides and added a strip of blue bling above it. On the top I placed a crocheted doily I have had in my stash for ages.


The flowers were made using some Heartfelt Creations dies and stamps and for the centers I added some multi color beads. The leaves were cut using the Robin's Nest Green Glitter Cardstock and a Spellbinder die. I also used a variety of Robin's Nest Dew Drops around the top of the box. 


For the two hearts I tried a new technique that I learned over at Creative Inspiration. You can use chipboard or even grungeboard as I did here. You will be using some tin foil, a couple of alcohol inks, blender solution and applicator. 


Place the alcohol inks and blender on the applicator and apply it to the shiny side of the tin foil. Keep pouncing it until you get your desired look and then let it dry. 


Take your chipboard/grungeboard and cover the top with any kind of glue. Turn your inked foil over and glue your chipboard/grungeboard to the back of the foil so the inked part will be showing on top of your chipboard/grungeboard.


Then using sharp scissors, cut around the chipboard/grungeboard and then press the foil lightly over the edges if needed with your finger. 


I then glued the two hearts on top of the doily and I was done. This was a quick and easy technique and I will definitely be trying it again.


This was a fun and easy project and think I might use it to hold a Christmas or Birthday gift for someone.

Thanks for stopping by!                    


Thursday, September 29, 2016

BOO

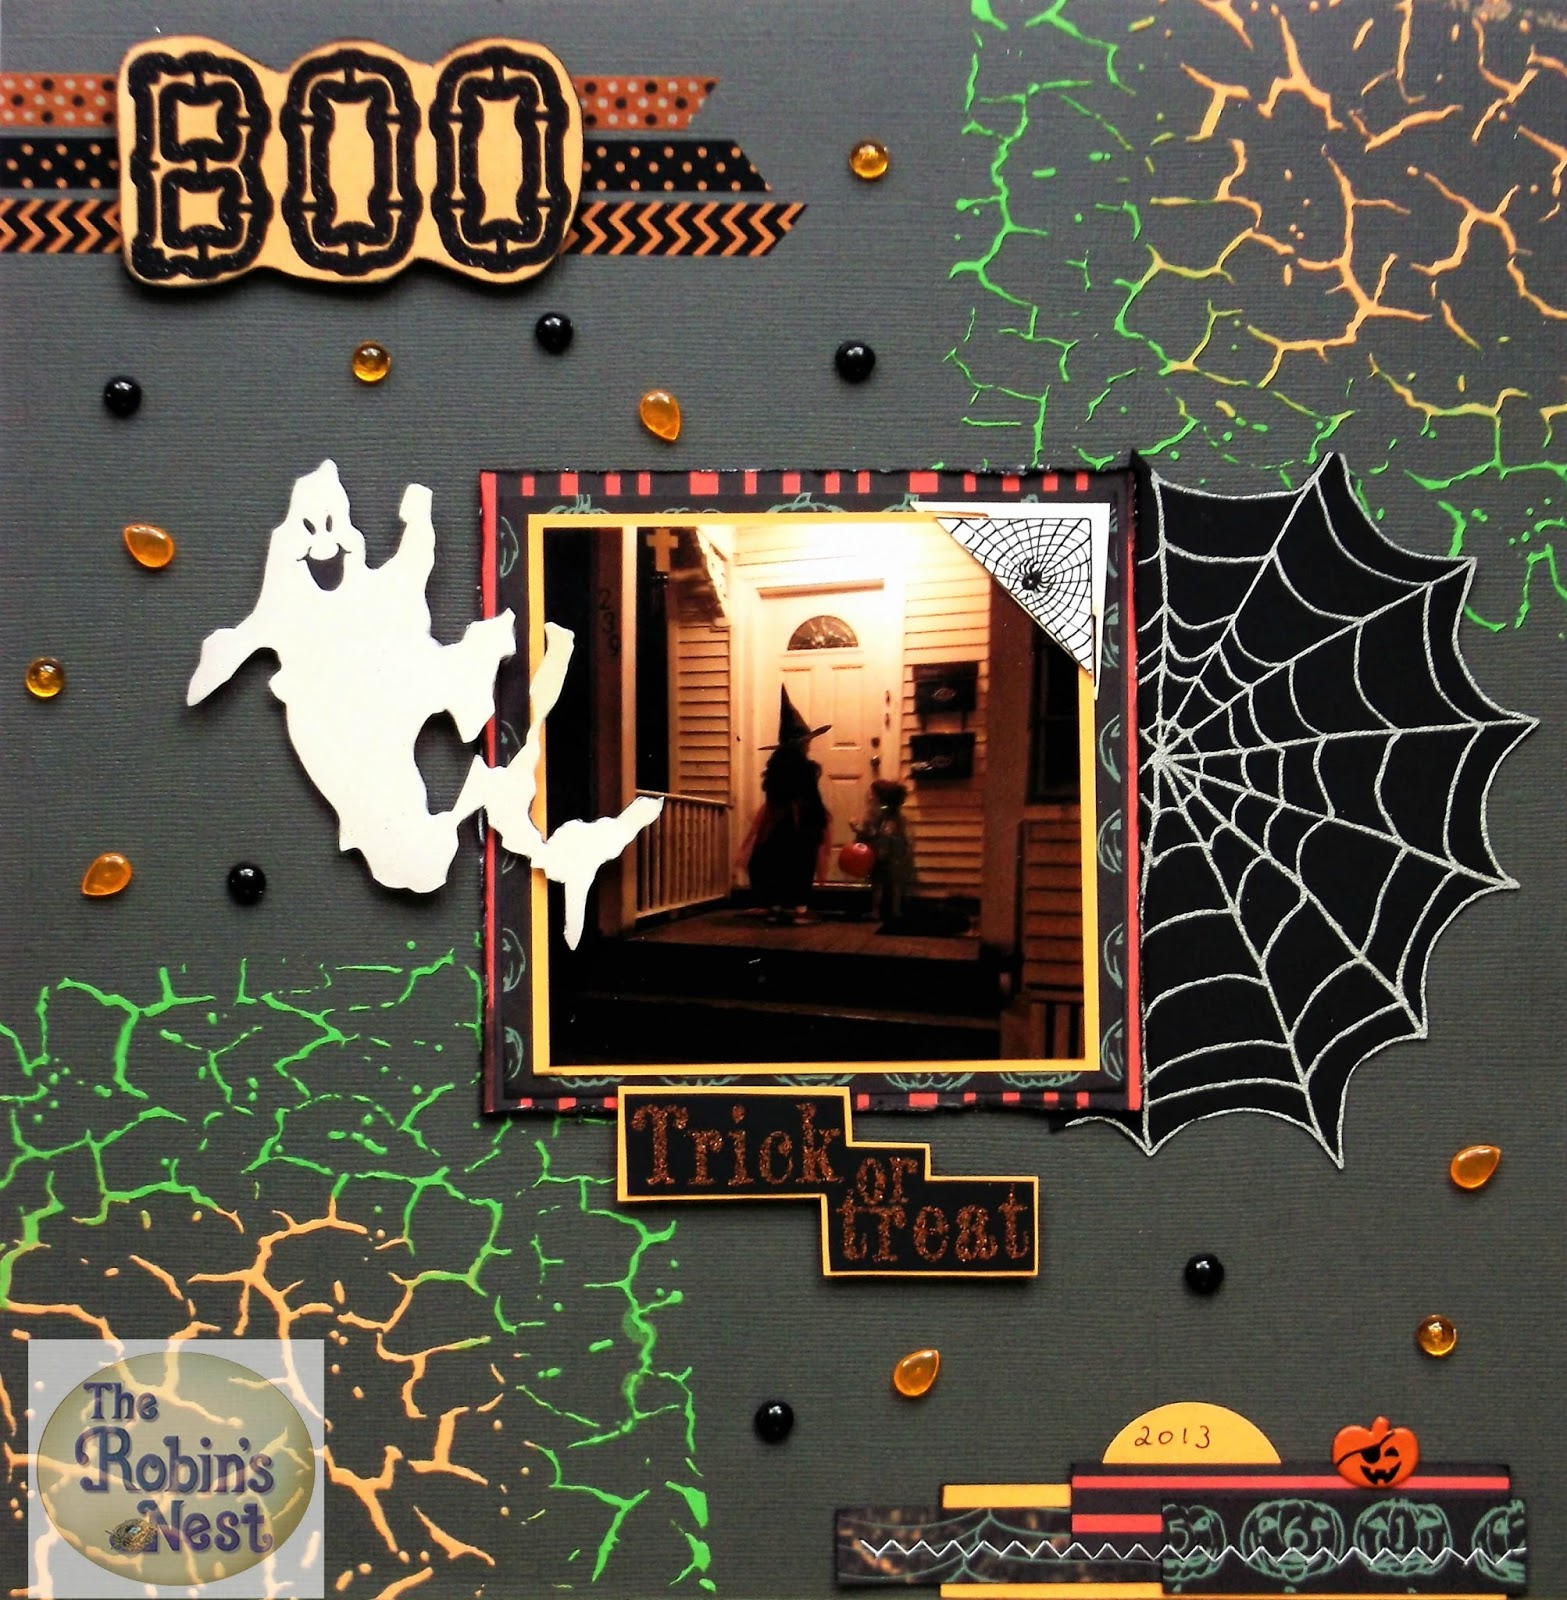
Here's a Halloween layout I did for the Robin's Nest Blog. Our theme this month is Oh So Scary and the papers from the Robin's Nest are perfect for a fun Halloween page. This is a photo of my two granddaughters trick or treating last year. One is dressed as a witch  and the youngest is dressed as Tinkerbell. I love this photo and have wanted to scrap it for a while. When I saw the Halloween papers from The Robin's Nest I knew they were perfect for this photo.


Other Products:
Prima Stencil
Gelatos
Gesso
Washi Tape
Cardstock

To start I took some Gesso and mixed it with some green and orange gelatos and applied it to the grey cardstock using a Prima Crackle Stencil.


I layered the photo on some orange cardstock and the back side of both the Pumpkin Head Cardstock and the Camo Ghost Glitter Cardstock which I also distressed.  I also added one of the Spider Clippies to the corner of the photo.


I took the Spiderweb Glitter Cardstock and fussy cut out one of the webs and tucked it behind the photo.


I then fussy cut out one of the ghosts on the Camo Ghost Glitter Cardstock and placed that coming off the photo on the opposite side from the spiderweb.


I also fussy cut the Trick or Treat caption from the Glitter Word Titles, backed it with some orange cardstock and placed it at the bottom of the photo.


For the title I cut out one of the Boo's from the Boo Words Glitter Cardstock and popped it up and put three strips of washi tape behind it.


I wanted to add the date to the page. So just to balance the title, I layered several strips of the papers I matted the photo with and sewed them onto the bottom corner and tucked in a circle with the year written on it.


And of course I had to sprinkle some Spooky Dew Drops around the page just to add a little sparkle.


I love doing Halloween projects and really had fun putting this layout together. Please stop by the Robin's Nest Blog to see all the other Halloween projects the Design Team has done this month.

Thanks for stopping by! 

Monday, September 26, 2016

Robin's Nest Sneak Peak

I've got a layout up at The Robin's Nest blog today and thought I'd share a sneak peak with you. Please stop by the blog to see the whole page and be sure and leave a comment.


Thanks for stopping by!

Friday, September 16, 2016

Happy Couple

I've got a recipe challenge in the mini crop going on over at Creative Inspiration this week. This month's theme is Anything Goes so we have a wide variety of different challenges going on during our week long crop.


To start I took some watercolor pencils and applied a wet paint brush to them and then painted on the vanilla cardstock in a random back and forth pattern. I then randomly stamped over the watercolor with a script stamp.


On one side of the layout I decided to do some stencil work. I took some texture paste and colored it with acrylic paint to get it to the colors I wanted. Then I applied it using a stencil. I also added a couple of pieces of washi tape coming out from behind the photo on both sides.


I matted the photo and then added some random strips of paper at both the top and bottom of the photo. I felt like it really made the photo stand out but didn't overwhelm it since the background is so busy.


I added some bling around the page and used a wood sticker for the title.


To finish I wanted to add the date so I took a couple of random strips of paper and 2 circles and sewed them onto the bottom of the layout.


I also added a few other embellishments around the page too.


So please stop by the Creative Inspiration website to check out all the fun challenges we have going on. Who knows....if you play along you may even win a prize!

Thanks for stopping by!


Thursday, September 15, 2016

Halloween Treat Boxes

Here are a couple of Halloween Treat Boxes I made using the Robin's Nest Friendship Wraps. These are so fun to work with. I thought these would be perfect for a little Halloween gift for my granddaughters. I plan on filling them with little trinkets instead of candy.


Other Products
Ink
Stamps
Washi Tape
Lace Seam Binding
Assorted Ribbons
Glow in the Dark Embossing Powder

To start I assembled the boxes using glue and let them dry so the glue would set well. I then traced each side onto the papers I was using and then hand cut them out and glued them to the corresponding sides. 


Then came the fun part.....adding all the embellishments. 
For the Happy Halloween one I stamped the front panel with a mason jar stamp, spiders and the sentiment. I embossed the spiders with some Glow in the Dark Embossing Powder (and yes, it really does glow in the dark). I also stamped some spiders on all sides and embossed them with the Glow in the Dark Powder. 


On the top I used some Washi Tape and then made some eyeballs using the Large Clear Dew Drops. I punched out some white circles and little green circles, layered them and drew the red veins on the white eyeballs. Then layered them under the Large Clear Dew Drops. Love how these came out!


For the Trick or Treat box I did the same for gluing and adding the paper to the Friendship Wraps.
Then I added the house and ghost diecuts to the front and sides. I also embossed the two ghosts with some of the Glow in the Dark Embossing Powder. For the ghost's eyes I added some of the Spooky Dew Drops.


For the top I used more Washi Tape and added some glittery letter stickers and a couple of Obsidian Diamond Dew Drops.


I decided to add some handles and used some black lace seam binding and added a few bits of colorful ribbon to it. 

These  Friendship Wraps are so cute and very easy to work with. I hope you'll try them!

Thanks for stopping by!

Monday, September 12, 2016

Robin's Nest Sneak Peek

I've got a project up at the Robin's Nest Blog today. Here's a quick little peak. I hope you'll stop by to see the whole thing and if you do, be sure and leave a comment.


Hope to see you there!

Monday, September 5, 2016

Hello Fall

We've got a DT Sketch Reveal going on today over at Turtle Soup. Please stop by and see all the different takes on this fabulous sketch.


Here's what I came up with


Fall is my favorite time of year and I just love these two pictures of my granddaughters on their way to pick apples that day. 

All the papers are from an old collection of Echo Park papers I recently found at Tuesday Morning. I just had to have them! I have lots of photos from last fall that I want to scrap so they were perfect!

Thanks for stopping by!


.