Tuesday, January 31, 2017

Fun Valentine's Day Mixed Media Love Tag with ScraPerfect

Every year it's a struggle to come up with a masculine Valentine's Day card for hubby. This year I thought why not try some mixed media for a change.


I started with a blank tan colored tag recycled from some packaging. I painted it with some white gesso and then started getting messy. I used a brick stencil and texture paste as a base layer and then before it dried I embedded some white cheesecloth in it. I then used my finger to apply some gelatos over the top.


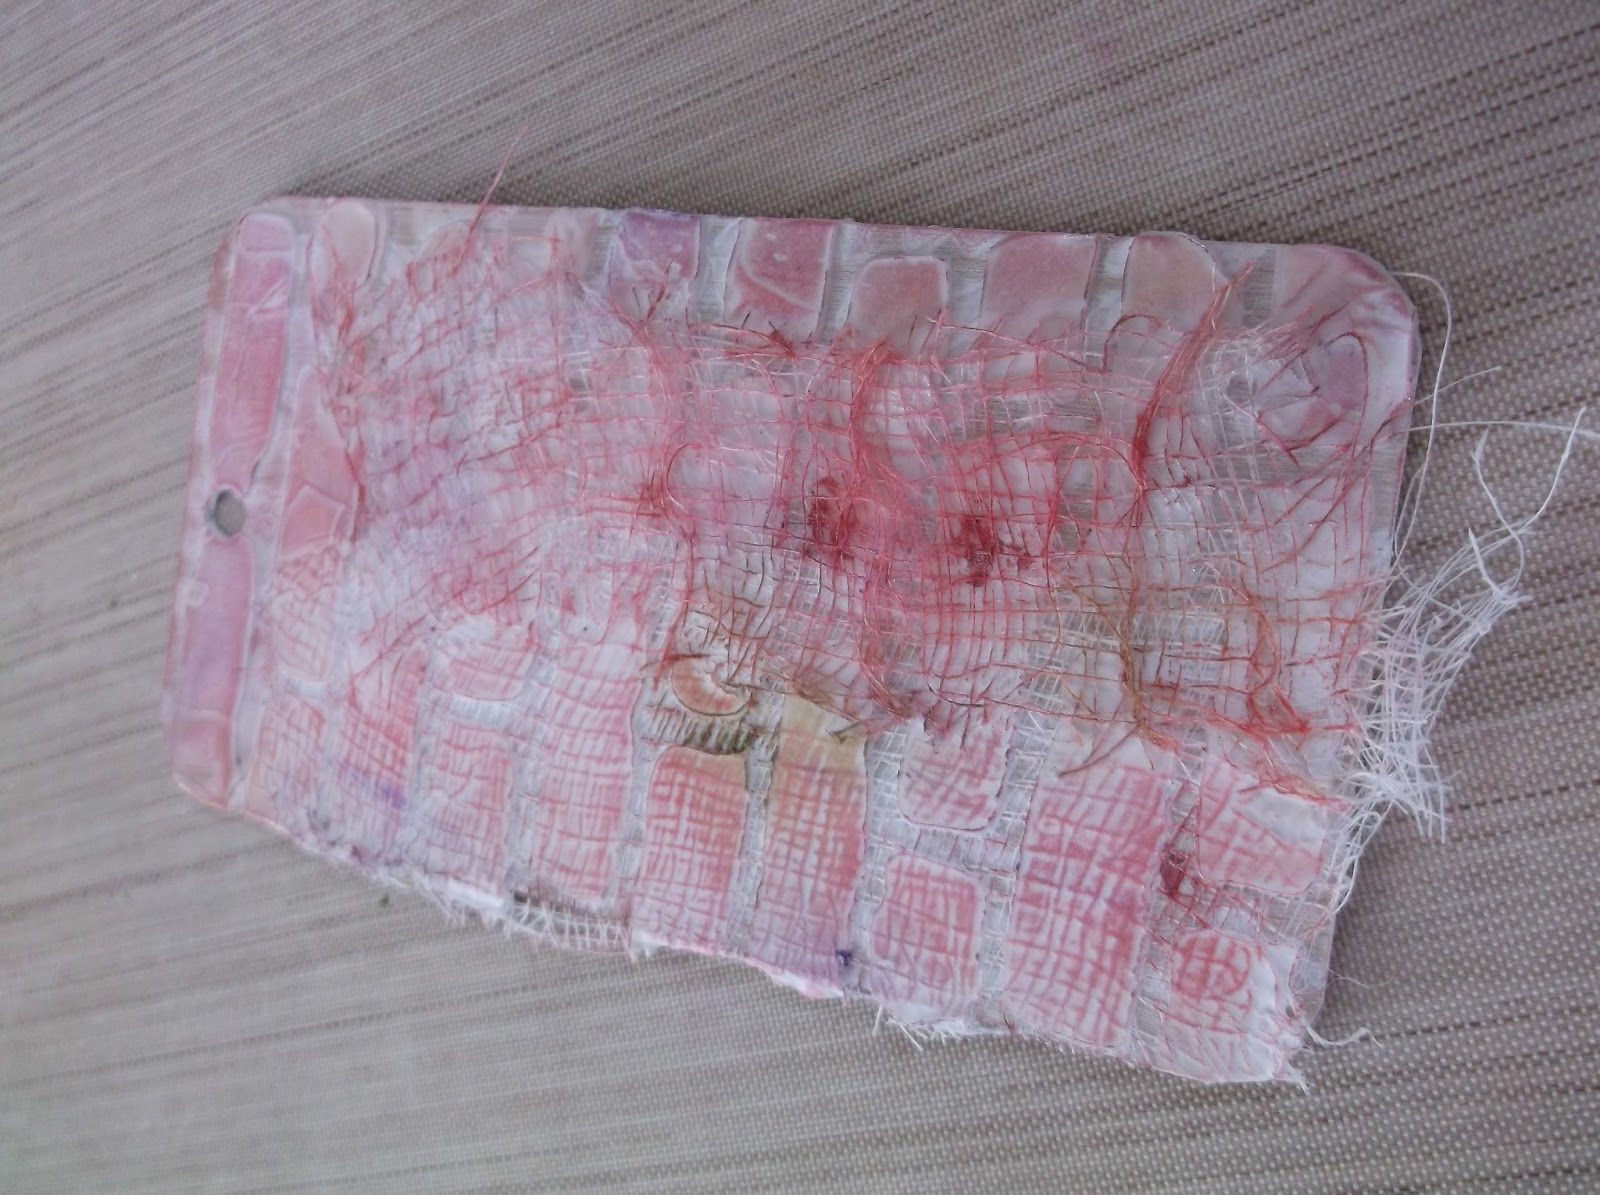
Then I added a starburst stencil on top using more white texture paste. I glued a cut up small doily, a flourish die cut and a kiss me sticker using some of the Best Glue Ever to the tag. They were really small pieces and using the No Clog Writing Cap made it so easy to get just the right amount of glue on the tiny pieces.


I made a die cut heart out of white paper and then used some red Transfer Foil on it. It's so easy! Just add a thin layer of the Best Glue Ever and let it dry til it's clear and tacky. Then lay the foil on top of the glue and rub the foil with your finger to get it to adhere to the glue. Pull the foil off and you have a beautiful shiny embellishment. I wanted mine to look distressed so I didn't apply glue to the whole heart so some parts were left white and then added some gelato to those areas.


Next came some glittery little hearts. I punched out several hearts and covered them with some of the Best Glue Ever and then sprinkled red glitter over them. I pressed the glitter into the glue with my finger and let them dry. 


I die cut the XOXO and glued everything onto the tag using more of the Best Glue Ever. It worked like a charm! I had such tiny pieces and a bumpy background but the Best Glue Ever worked great!


Thanks for stopping by!

Thursday, January 26, 2017

It looks like a cold sparkly winter day

Hello Everyone! Here's a gray monochromatic layout I did for the Robin's Nest Blog recently.  I was inspired by a painting done by Bob Ross. He did a beautiful winter scene in all grays. I went digging through my photos and found this one that looks like a black and white photo except for my granddaughters in the center.


Robins Nest Products


Other Products
Punches
Stickles
Gesso
Glitter
Die Cuts

I started with a piece of white cardstock. I mixed some gesso and black paint to get a grayish color and then applied it randomly to the cardstock. I also sprinkled some black glitter over it to give it a bit of sparkle.


Next I broke out my punches, a snowflake one and a scalloped one. I punched two one inch strips of the dotted back of the Smokey Chevron Cardstock with the snowflake border punch along with a plain white piece of cardstock and then layered them along the bottom of the layout.


I then used the scallop border punch and punched a one inch strip of the Smokey Chevron Cardstock, the Black Daisy Glitter Stripe Paper and the Silver Castles Glitter Cardstock.  I placed them in the center of the background page.


To mat the photo, I first punched 2 opposite corners using a snowflake punch and then backed the photo with white cardstock. I took one of the Orange Crush Cards, cut it in half and added it to either side of the photo. 


I had the die cut trees left over from an earlier project and thought they would be perfect for this layout but they needed something. I decided to run a thin line of stickles around the edges using the No Clog Writing Cap by ScraPerfect. It worked beautifully! I then popped the trees up for some dimension along the bottom of the photo.


The title, You and Me, was cut from the Wedding Cut-Outs Cardstock and I wiped some metallic creme chalk around the edges and then popped it up over a banner cut out of the Black Daisy Glitter Stripe Paper.


I took some of the Rosy Straw and ran that along the bottom punched layers and secured it with some of the Best Ever Glue by ScraPerfect. I also sprinkled several different types of dew drops around the page using some more of the Best Ever Glue by ScraPerfect and the Embellie Gellie by ScraPerfect. That embellie gellie makes it so easy to get the dew drops exactly where you want them!


Here's a final look at my layout:


Thanks for stopping by!

Monday, January 23, 2017

Sneak Peek for Robin's Nest

Here's a quick little peek of a project I have up over at The Robin's Nest Blog today. I hope you'll stop by the blog to see the whole project.


Thanks for stopping by!

Thursday, January 19, 2017

Lover's Key

Here's a layout I did for an inspiration challenge over at Creative Inspiration. The mood board used for the inspiration was pictures of beaches and all things summer. So I decided to do a layout about Lover's Key in Florida.


This was a quick and easy page. I took 3 different metallic gellatos and scribbled on the white background paper and then dipped my finger in water and went over top the gellatos to blend them together.  The shells on here are from Lover's Key and I used some of the Best Glue Ever to get a good strong hold. Love that glue!

Thanks for stopping by and happy scrapping!

Luray Museum

I've got a layout up today at the ScraPerfect Blog.  We took a trip in October of last year and headed up to the Boston area to see the kids and on the way home we drove down Skyline Drive in Virginia and stopped at Luray Caverns. We found the Luray Museum next door and just had to take pictures of us sitting in this chair made from the base of a huge tree trunk.


I started by getting a little messy using a stencil and modeling paste to create a wood grain looking background. Then I added a few rust colored splats using Lindy's Stamp Gang starburst dauber. I love those things, they are so fun to play with!
While that was drying, I matted my photos with some corrugated paper. I've always had a hard time getting things to adhere well to that type of paper. I used the Best Glue Ever with the No Clog Writing Cap and it worked so well. I was able to get fine lines of glue along the raised parts of the corrugated paper using the  No Clog Writing Cap with the fine tip.


For two of the corners I cut some really thin strips of Core'dinations paper and ran them through my Cuttlebug using a wood grain embossing folder and then sanded them to get the green to come through. Again, I used the Best Glue Ever along with the No Clog Writing Cap with the fine tip to get just the right amount of glue on the tiny strips of paper.


The title is made from stickers and I never have luck with them sticking. So, just in case they don't hold on their own I added a dab of the Best Glue Ever to the back of each letter.  I dare them to fall off now!! lol


Then I decided to add some flowers so naturally I used more of the Best Glue Ever and even used it to hold the twine and strips of paper under the flowers.


Here's another look at the finished layout


Thanks for stopping by and please stop by the ScraPerfect Blog and see all the different things you can do using their fabulous products. 


Thursday, January 12, 2017

Trees

I had a project up at The Robin's Nest Blog several days ago and wanted to show you my project. This photo was taken along Skyline Drive in Virginia last fall. I love old trees like this...it just makes me wonder how old it really is and why it managed to live so long while all the others around it are all gone.


Robin's Nest Products


Other Products
Gesso
Texture Paste
Stencils
Gelatos
Wood Veneers
Green and brown cardstock

To start I decided to get a little messy and broke out the Gesso and Texture Paste. I took the Pinetrees Glitter Cardstock and painted a stripe across it using some white Gesso. Once that dried, I mixed some texture paste with some brown and green gelatos and then using stencils, I added the colored texture paste across the white strip of gesso.


I then worked on matting the photo. I took the Forest Trees Speciality Paper and tore it on 2 sides to fit the photo and then added a brown and green piece of cardstock behind the Forest Trees Speciality Paper. As you can see in the photo I let the matting show only on 2 sides of the photo.


I popped up the photo and matting to give the page some dimension and added 2 of the Leafy Green Cards to the photo also.


I then took 2 of the Outdoors Stickers and patted the sticky backs of them with the Perfect Crafting Pouch by ScraPerfect to get rid of the stickiness and popped them up for more dimension and placed them on top of the stenciled area. I also added some wood veneer pieces that I colored with a brown gelato along with some Blackforest Mini Dew Drops and  Riverbed Tear Drops. To adhere them I used the Embellie Gellie by ScraPerfect and some of the Best Glue Ever by ScraPerfect. It still amazes me that you only need a tiny little drop of that glue and it holds so well and doesn't show through the dew drops.


Here's another look at the final project


Thanks for stopping by!

Wednesday, January 11, 2017

Valentine's Day Card

I've got a stash challenge up today at Creative Inspiration. You need to use nothing but paper scraps for your project except for the base and any embellishments. Here's my example:


Everything except for the white base card, the XO washi tape and the red Nuvo drops is scraps from an old Echo Park collection I've had for a couple of years. You can make a card, layout, ATC or altered project just as long as you use up some of your paper scraps and I know we've all got a big stash of scraps!

Thanks for stopping by and have a scrappy day!

Monday, January 9, 2017

Another Sneak Peek!

I've got a post up at The Robin's Nest Blog today and wanted to share a sneak peek with you!


I hope you'll stop by the blog and see the rest of my project!

Thanks for stopping by!

Sunday, January 8, 2017

Magnolia Stamped Card

I just got my first Magnolia stamps and I was so eager to try one of them out. I also have a card sketch challenge up at Creative Inspiration today. It was a perfect sketch to try out my new stamps.


And here's the sketch


It's a very simple card but I wanted the stamp to stand out. I love these stamps....they are so crisp looking! I colored the stamp using watercolor pencils and chalk for the background. I think I'll be using this as a Valentine card.

Please stop by Creative Inspiration and play along with some or all of our challenges! Hope to see you there!!

Thanks for stopping by!


Thursday, January 5, 2017

Altered Tin with ScraPerfect

I've got a New Year's project up at the ScraPerfect blog today. I found this plain tin at Tuesday Morning and thought I'd try dressing it up for the New Year. It was the perfect size for a hostess gift for a New Year's Eve party we were invited to.


Here's what I started with. Just a plain black tin with a clear top. It definitely needed some TLC.


I wanted to make some sparkly balloons and what better to use than some of the Best Glue Ever.
I cut the balloons out with my Cricut and then went to town on them with the glitter.

I started by putting some of the Best Glue Ever on each balloon and then spreading it around. You can use a paint brush or sponge but I like getting messy so I used my finger.

Then I sprinkled some gold glitter on two of the balloons and some silver glitter on the other two. I tapped off the excess and then just pressed down on the glitter with my fingers to make sure it really stuck to the paper.


I let them dry and then added a light coat of the Best Glue Ever over the top of the glitter so it wouldn't flake off. I was going to put some food in the container and I didn't want to get any glitter on the food. I let it dry overnight and it was still a bit tacky but I figured that would be better than having pieces of glitter flake off onto the food. 


I then took some number stickers and removed the adhesive from them using the Perfect Crafting Pouch. I just patted the back of the stickers and no more stickiness. Stickers never seem to really stick to a glittered surface and as this was a gift, I wanted to be sure they stuck. So of course I used some of the Best Glue Ever and glued each sticker to one of the glittered balloons. I took some gold string and glued it to the back of each balloon to make the balloon tails and then gathered them together and tied a bow around the tails. 
I wanted to dress up the bottom of the tin but didn't have much room as this isn't a very deep tin. I found some gold sparkly ribbon and glued that around the base using the Best Glue Ever


For the inside of the tin I cut a piece of gold and cream paper just big enough to show through the clear part of the lid. I found some black sparkly paper in my stash that was just perfect for cutting out the Happy New Year on my Cricut. Then it was time to assemble everything on the lid. I glued the balloons using more of the Best Glue Ever and then decided to pop up the sentiment which also helps keep the balloon tails in place. 

Here's another look at the finished project


Thanks for stopping by!